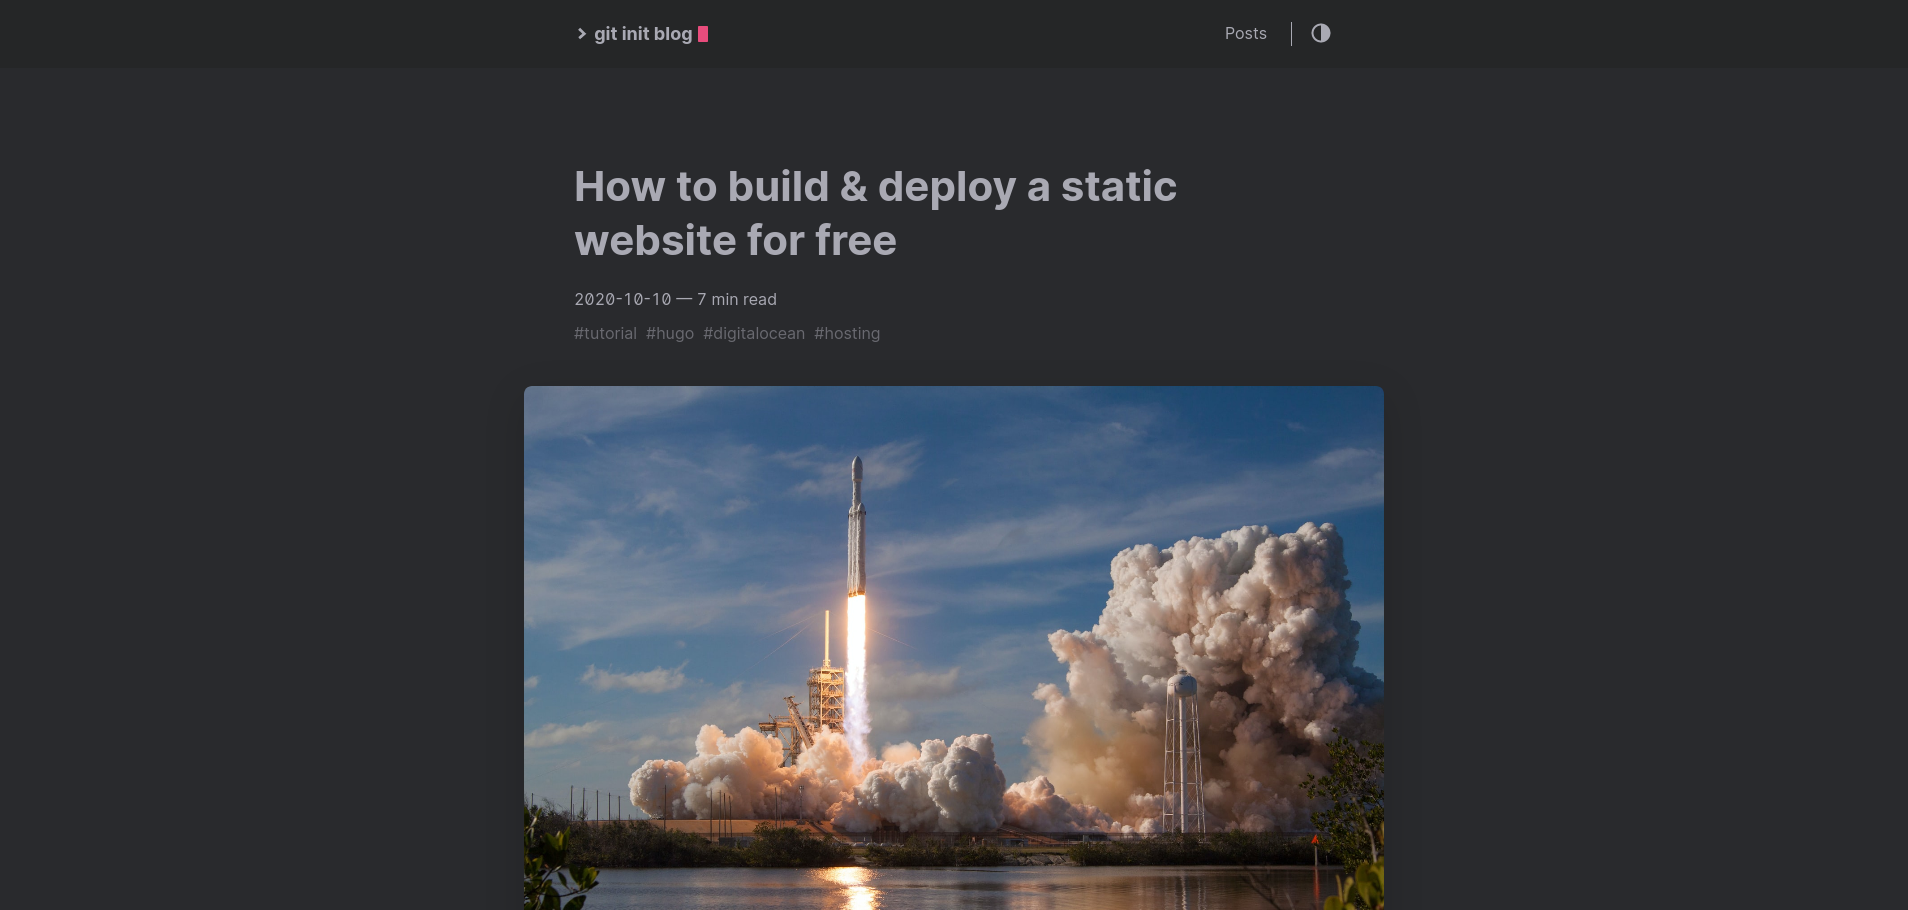
How to create, build & deploy a static website for free using DigitalOcean App Platform and Hugo

So, here we are. I’m writing my very first blog post using markdown in VS Code and it’s actually convenient, not so awkward as I’d expect.
Introduction
This week I received mail from Digitalocean (DO). A hosting company deluxe or “developer cloud” according to DO. A company that I’ve known for some years now, thanks to them I have quite some experience in managing servers. They offer virtual private servers (VPS. They call them droplets) from $5 a month. Which makes having a VPS accessible for most of us.
So what can you do with a droplet? Well, a lot. It’s a computer. For example I’ve hosted multiple web applications and websites on DO. Until last year. Since droplets are computers and computers need updates, so did the droplets on which those things were hosted. And I got afraid. What if things went wrong? Well I do have back-ups enabled etc and DO provides multiple solutions (snapshots) to make sure you can get back to how things were. I did not feel like doing this, it just was too much of a hassle. Although I enjoyed managing those droplets for a long period, I got tired of it. And decided that the worries weren’t worth it. I found a hosting provider in the Netherlands that suited my needs. I migrated and never had to worry again. My servers are now managed. I’m a lot less in control but that is totally fine for the time being. The stuff hosted over there is “simple” and does not need the custom care that is available for me through a VPS.
Back to the mail. It stated that DO launched a new platform. And it’s called App Platform. In my eyes, a healthy rival for Heroku and Netlify. Can’t wait to see them compete with each other. Opening the App Platform from DO in my browser I immediately was astonished.. It was so intuitive. Within minutes my sample app was running on a subdomain with HTTPS enabled. This is just a simple example but after reading the docs it felt like this platform has great potential (maybe even for production environments). Time will tell.
There was an opportunity for me. Since I did not have any droplets anymore (did not want rent new) and also didn’t feel like hosting a static website at my hosting provider, I was stuck with the idea of having a blog. It would be good for my personal development. It would serve as a digital and webhosted notepad. For me to put interesting stuff on that I encountered or learned in daily life. And this can be everything. A particular subject in the book that I’m reading, some experience I want to share, new cool development stuff, personal achievements or moments of growth and maybe even philosophy? Just so that it would stick with me. I’m having difficulty staying in the present and maybe this is going to support me with staying in the present and becoming more aware of things.
This App Platform, this could make the idea of a having a blog become real. I mean, it isn’t rocket science but it felt good this time. And for free (maybe that is why it felt good) because that’s what DO stated:
Starter: Free. Good to try App Platform and deploy static sites.
Tutorial
First I needed to find myself a static site generator. Early on in 2020 I started researching, and paused it after 2 hours to continue this morning. Earlier this year I guess I wasn’t motivated enough. I could not grasp the concepts of various generators and just didn’t find it interesting enough. Today I did. They come in different flavors and I was going to choose between these three:
Thanks to Reddit user “30thnight” for making this easy. His comment convinced me to use Hugo. Before reading his comment I came passed several blog posts stating the same as what he stated. It feels as if they do differ a lot but a lot of people tend to switch between them. Hugo seemed to match with what I think that is important.
- Ugly & confusing templating language.
- Documentation is decent but confusing at times.
Joking ofcourse. I like Hugo because:
- It is fast and that there is lots of room for customization (if needed). Being experienced with PHPs Smarty I should be fine working with the template language.
- Besides from the Hugo executable there are zero dependencies.
- So far no JavaSript.
Until now the whole experience has been convenient. I mean, it’s seems really accessible to me. So far, glad I decided to go with Hugo.
Installing Hugo
I’m running a Linux distro called Manjaro. Since I don’t want to install extra Package Managers such as Homebrew and did not want to build the binary myself I decided to just download it. For me it boils down to the following commands since I already have a ~/bin folder and have added it to my PATH (further reference see this):
wget -qO- https://github.com/gohugoio/hugo/releases/download/v0.76.3/hugo_0.76.3_Linux-64bit.tar.gz | bsdtar -xvf- --include hugo
sudo mv hugo ~/bin
Now check if everything is installed successfully
$ hugo version
Hugo Static Site Generator v0.76.3-E9623459 linux/amd64 BuildDate: 2020-10-08T17:10:58Z
Yep. Hugo is successfully installed now.
If you’re installing Hugo this way you’ll have to update Hugo yourself.
Creating the static website
This is really simple. It will create a directory my-blog and put all of the initial files in it. We change directory (cd) to my-blog and initialize a new git repository (git init).
hugo new site my-blog
cd my-blog
git init
Now, we need a theme to get us up and running fast. I went for hello-friend from panr (thanks dude great theme). There are lots of themes available on https://themes.gohugo.io.
Since I am not planning to make any changes to the theme for now I went for the easiest way of installing a theme. Adding it as a git submodule.
git submodule add https://github.com/panr/hugo-theme-hello-friend.git themes/hello-friend
# git submodule add <URL_OF_REPOSITORY> <DIRECTORY_TO_CLONE_REPOSITORY_TO>
# example: git submodule add https://github.com/boumanb/happy-theme themes/happy-theme
Serving the static website
Normally you’ll use hugo server -t <NAME_OF_THEME> but I’m also adding the -D option because I want drafts to be displayed during development (and I guess you will too).
hugo server -D -t hello-friend
# hugo server -D -t <NAME_OF_THEME>
Your static website is now being served at http://localhost:1313, go visit it! In my case it’s empty. I did not yet configure the theme nor added any content.

Configuring the static website
The Hugo theme usually come with their own configurable thingies (depending on the features they have). The basic configuration for the hello-friend theme can be found here. All you have to do is copy-paste it into your config.toml file located in the root of the new-blog directory. Adjust where needed.
Writing your first post
hugo new posts/my-first-post.md
Open up the directory in your favorite IDE and navigate to content/posts/my-first-post.md. It should look somewhat like this.
---
title: "My First Post"
date: 2020-10-10T16:48:21+02:00
draft: true
---
Everything between --- is called Front Matter it enables us to pass metadata.
For example. The Front Matter of the page you’re currently reading looks like this:
---
title: "How to create, build & deploy a static website for free"
date: 2020-10-10T12:36:20+02:00
keywords: "Hugo static build deploy free website hosting"
summary: "Hi! Welcome to my blog. This is my first post so please be kind and I'll explain how I have built and published my blog! And the best part; it did not cost me anything. I managed to do this for free. The post covers the following subjects: Static website generators (Gatsby, Hugo and Jekyll), Git (with submodules) in combination with GitHub, Automation, Writing Markdown, Hosting (DigitalOcean), DNS and Personal growth."
description: "Hi! Welcome to my blog. This is my first post so please be kind and I'll explain how I have built and published my blog! And the best part; it did not cost me anything. I managed to do this for free. The post covers the following subjects: Static website generators (Gatsby, Hugo and Jekyll), Git (with submodules) in combination with GitHub, Automation, Writing Markdown, Hosting (DigitalOcean), DNS and Personal growth."
cover: "spacex-launch.jpg"
useRelativeCover: true
coverCaption: "Image credit to [SpaceX](https://unsplash.com/@spacex) on [Unsplash](https://unsplash.com)"
tags: [tutorial, hugo, digitalocean, hosting]
draft: true
---
--- is all my content. Written in Markdown and it looks like this:
*So, here we are. I'm writing my very first blog post using markdown in VS Code. And it's actually convenient, not so awkward as I'd expect.*

## Introduction

This week I received mail from [Digitalocean](https://digitalocean.com) (DO). A hosting company deluxe or "developer cloud" according to DO. A company that I've known for some years now, thanks to them I have quite some experience in managing servers. They offer virtual private servers (VPS. They call them droplets) from $5 a month. Which makes having a VPS accessible for most of us.

So what can you do with a droplet.....
---
title: "How to create, build & deploy a static website for free"
date: 2020-10-10T12:36:20+02:00
keywords: "Hugo static build deploy free website hosting"
summary: "Hi! Welcome to my blog. This is my first post so please be kind and I'll explain how I have built and published my blog! And the best part; it did not cost me anything. I managed to do this for free. The post covers the following subjects: Static website generators (Gatsby, Hugo and Jekyll), Git (with submodules) in combination with GitHub, Automation, Writing Markdown, Hosting (DigitalOcean), DNS and Personal growth."
description: "Hi! Welcome to my blog. This is my first post so please be kind and I'll explain how I have built and published my blog! And the best part; it did not cost me anything. I managed to do this for free. The post covers the following subjects: Static website generators (Gatsby, Hugo and Jekyll), Git (with submodules) in combination with GitHub, Automation, Writing Markdown, Hosting (DigitalOcean), DNS and Personal growth."
cover: "spacex-launch.jpg"
useRelativeCover: true
coverCaption: "Image credit to [SpaceX](https://unsplash.com/@spacex) on [Unsplash](https://unsplash.com)"
tags: [tutorial, hugo, digitalocean, hosting]
draft: true
---
*So, here we are. I'm writing my very first blog post using markdown in VS Code. And it's actually convenient, not so awkward as I'd expect.*

## Introduction

This week I received mail from [Digitalocean](https://digitalocean.com) (DO). A hosting company deluxe or "developer cloud" according to DO. A company that I've known for some years now, thanks to them I have quite some experience in managing servers. They offer virtual private servers (VPS. They call them droplets) from $5 a month. Which makes having a VPS accessible for most of us.

So what can you do with a droplet.....
Go on and start writing your first post using Markdown! Every change you make is being processed in real-time and review it on http://localhost:1313/posts/my-first-post.
Make sure your are serving the website: hugo server -D -t <NAME_OF_THEME>.
Not that familiar with Markdown? It is commonly used for technical documentation, that’s how I’m already familiar with it. Here’s a nice guide.
Pushing the code to GitHub
I’m assuming you already have registered on GitHub and have experience using GitHub.
In my-first-post.md set draft: true to draft: false.
Create a repository on GitHub and leave it totally empty. This means answering “Initialize this repository with:” with:
- Private enabled (for now)
- No README
- No .gitignore
- No license
- After pressing “Create repository” follow steps for
…or push an existing repository from the command line.
Open up a terminal inside of my-blog and follow the steps:
git remote add origin [email protected]:<YOUR_GITHUB_USERNAME>/<REPO_NAME>.git
git branch -M main
git push -u origin main
Building and deploying the website via DO App Platform
Make sure you have an account on Digitalocean (non-referral link) if you do not have an account set up yet consider using my referral link. We’ll both get free credit ($100, valid for 60 days).
The steps
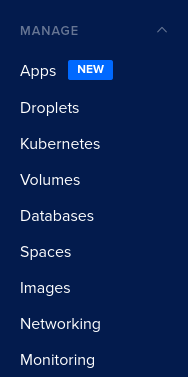
Let me take you through the steps. First, log in and get to the App Platform by clicking “Apps” on the left.
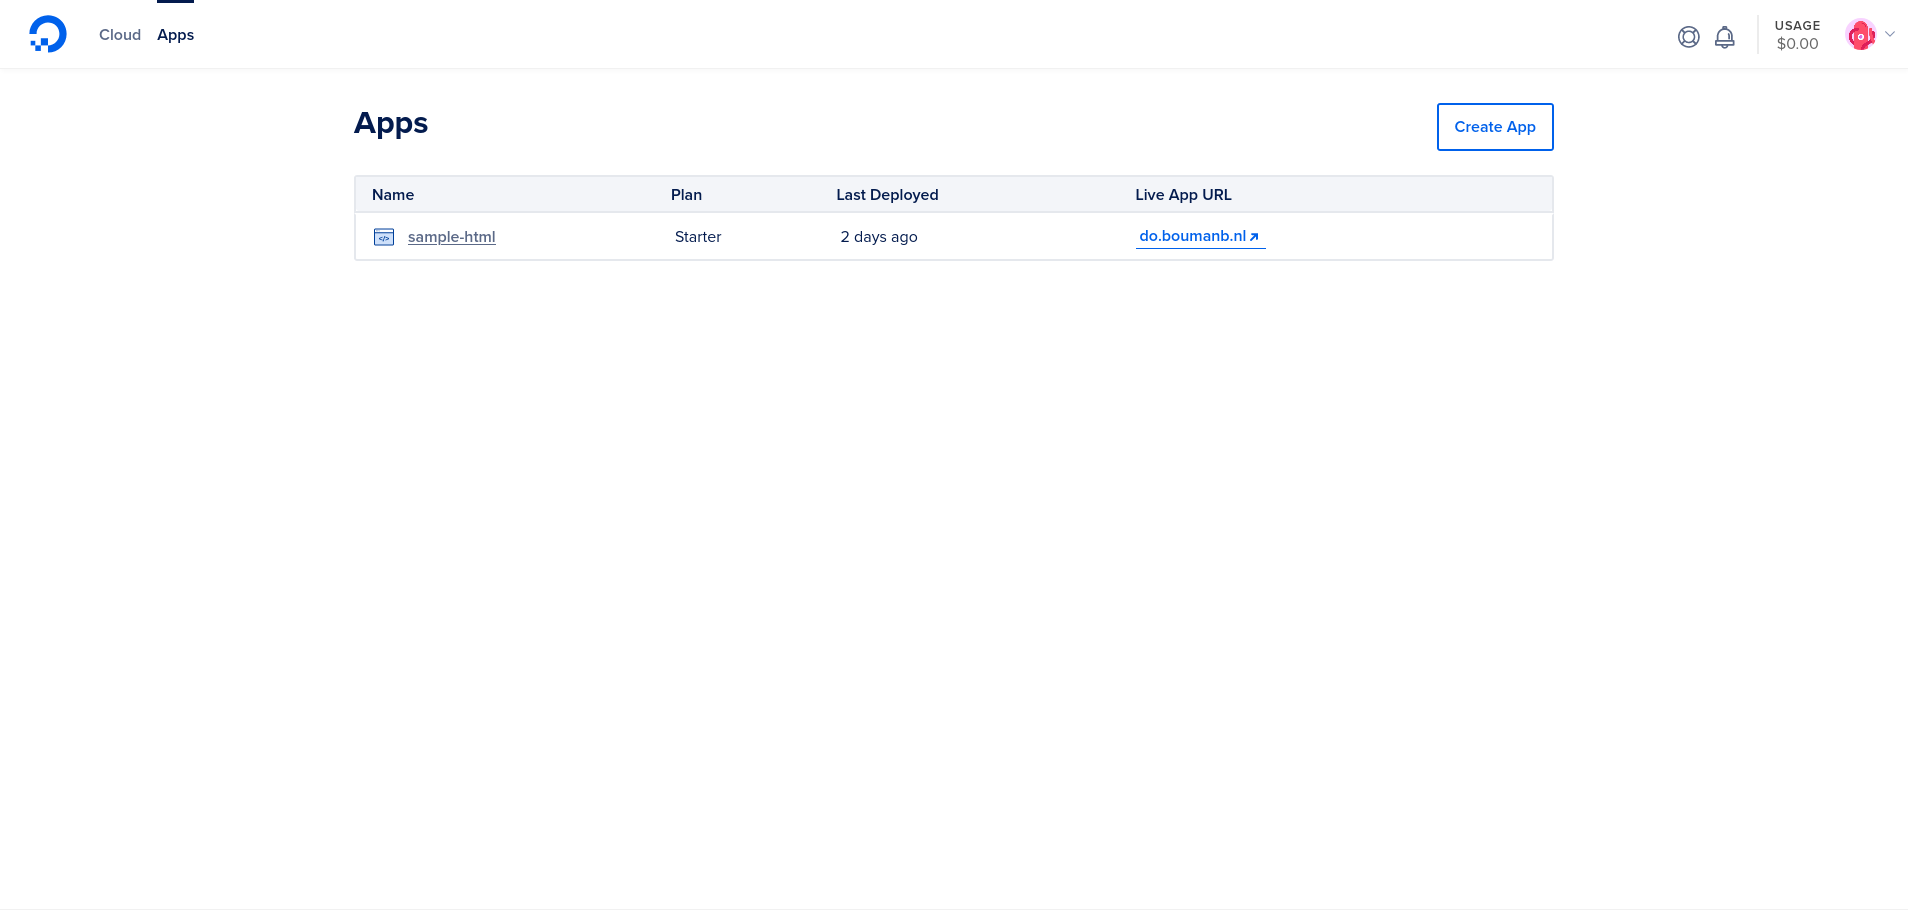
Now here you’ll find all of your current apps. I have just started. So all I have running currently is the sample app. Start adding our new blog by clicking “Create App”.
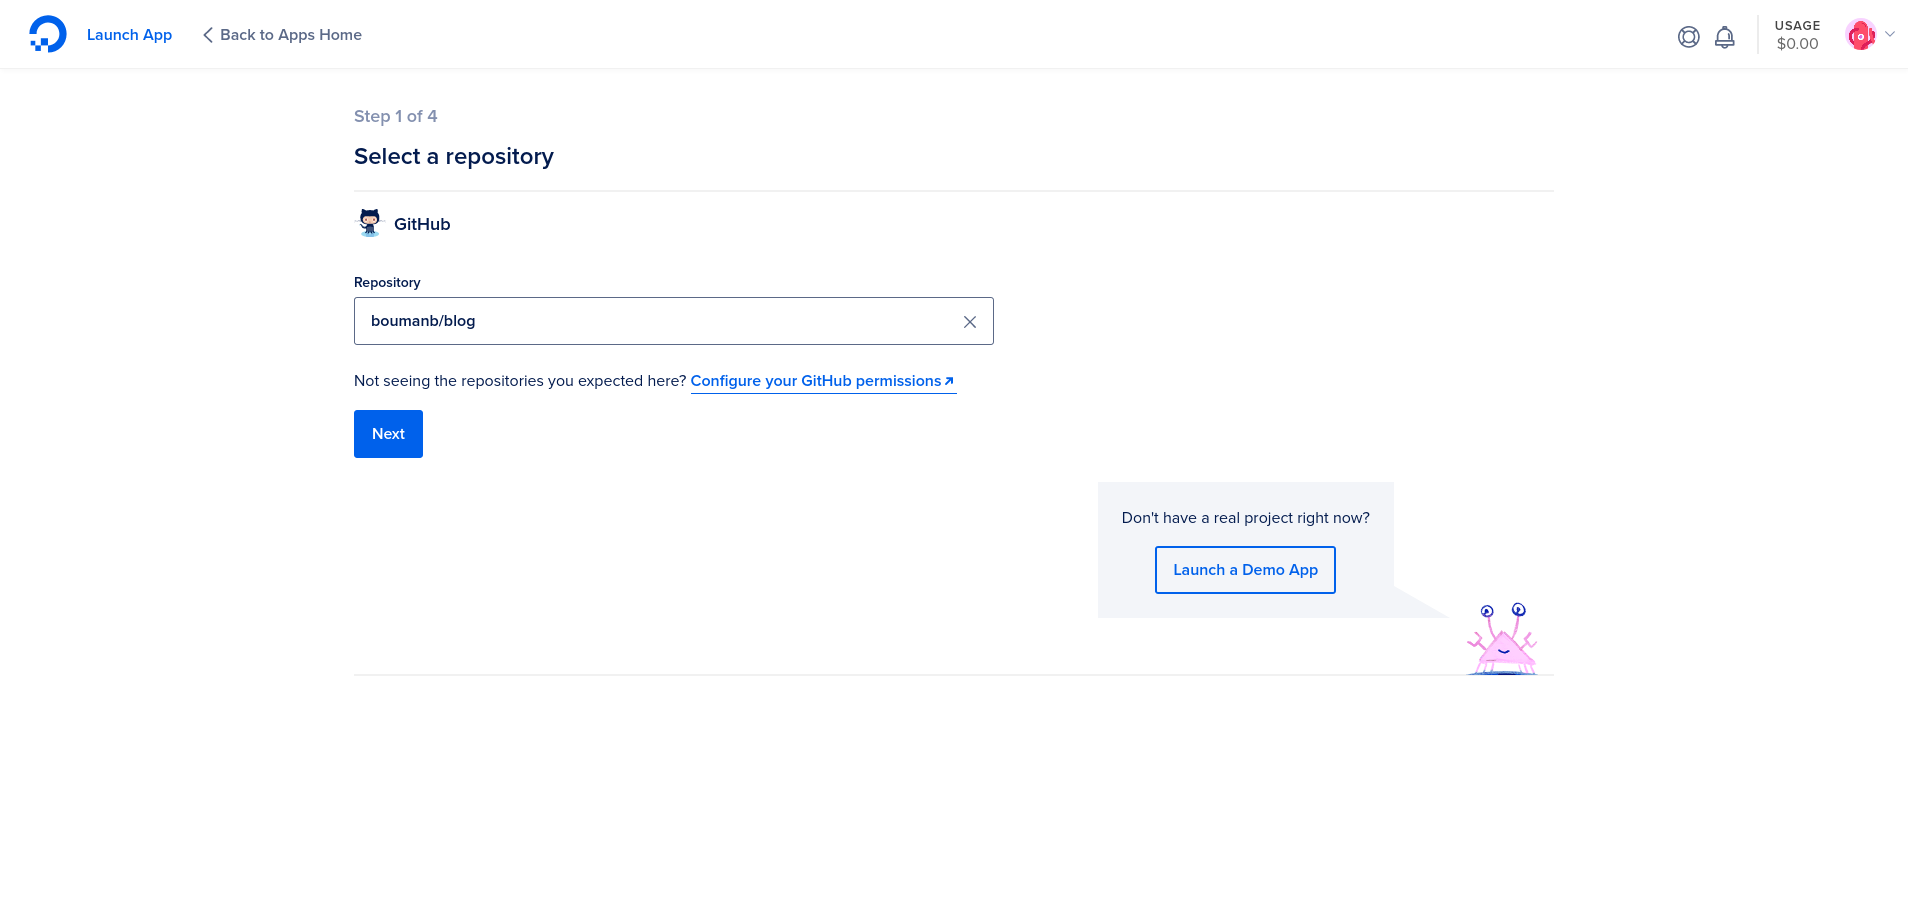
I’ve already given Digitalocean permission to my GitHub profile. You should too when you want to publish your new blog. After giving permission, make sure that you’ve pushed everything into your remote repository and your good to go. Select the correct repository and click “Next”.
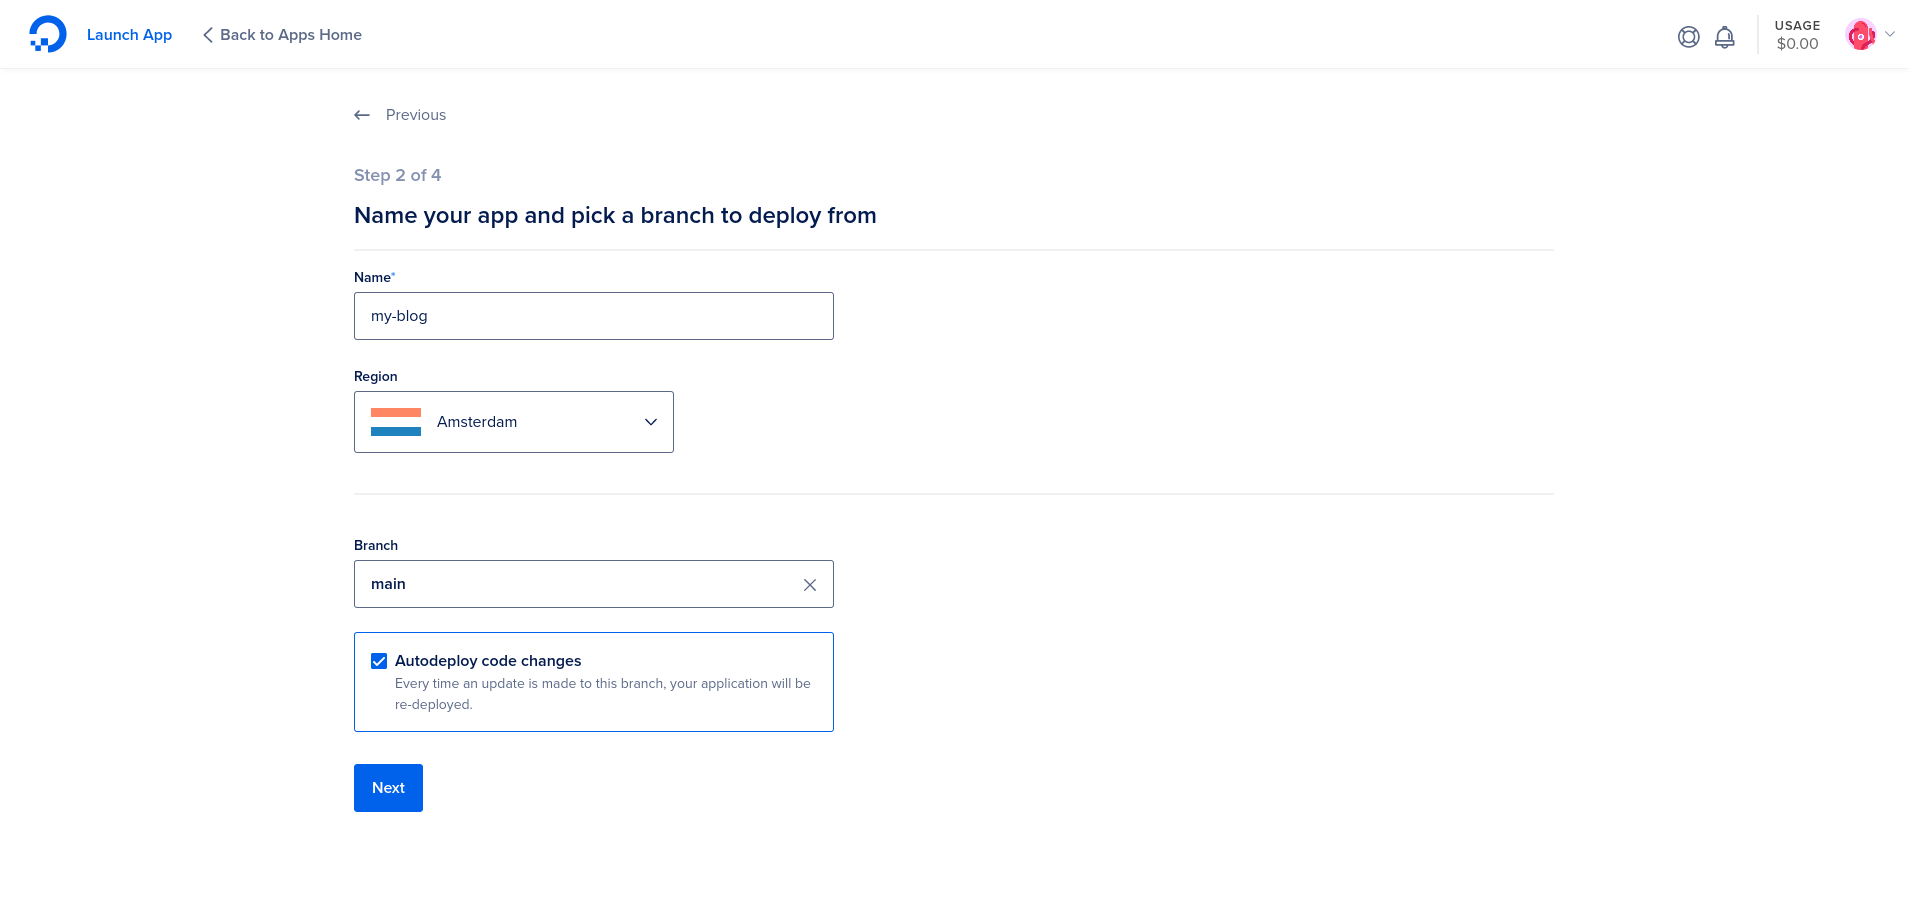
Adjust to your liking and press “Next”. I keep “Autodeploy” on because it’s cool, I am not going to press deploy everytime. I’ll just merge (through PR) or push to the main branch and let it be deployed fully automated.
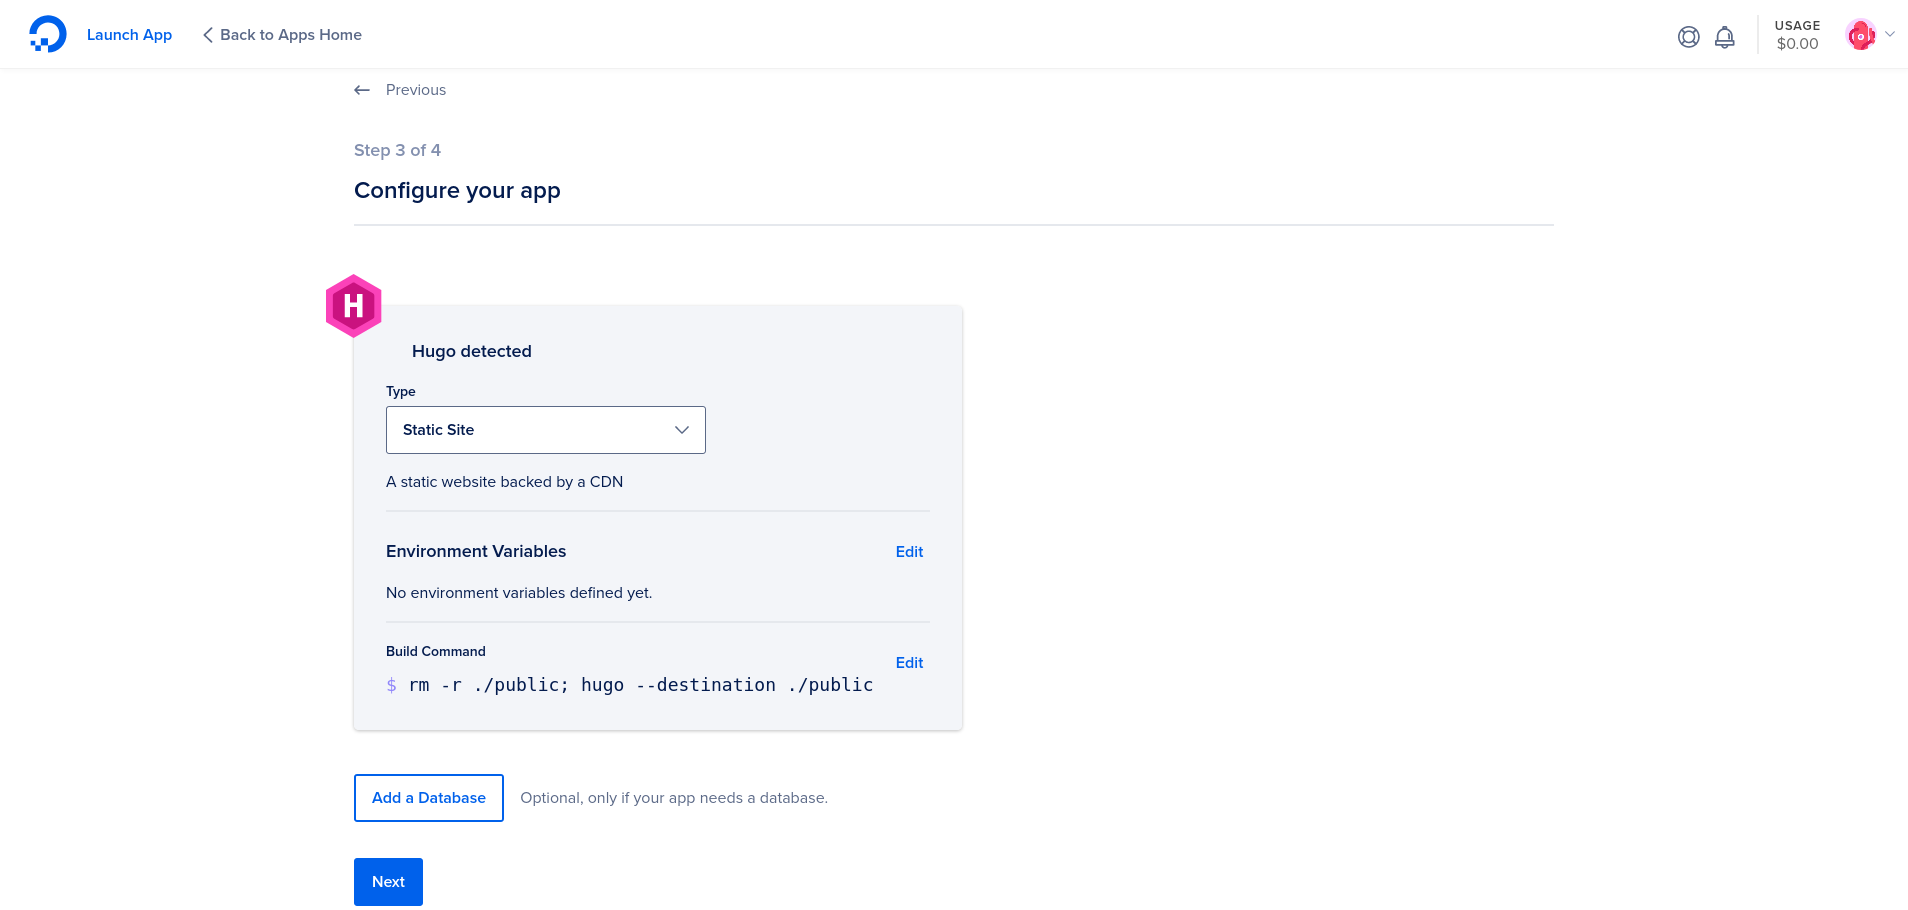
So, Digitalocean has already determined that our static website was made using Hugo. All these settings are correct for now. Press “Next”.
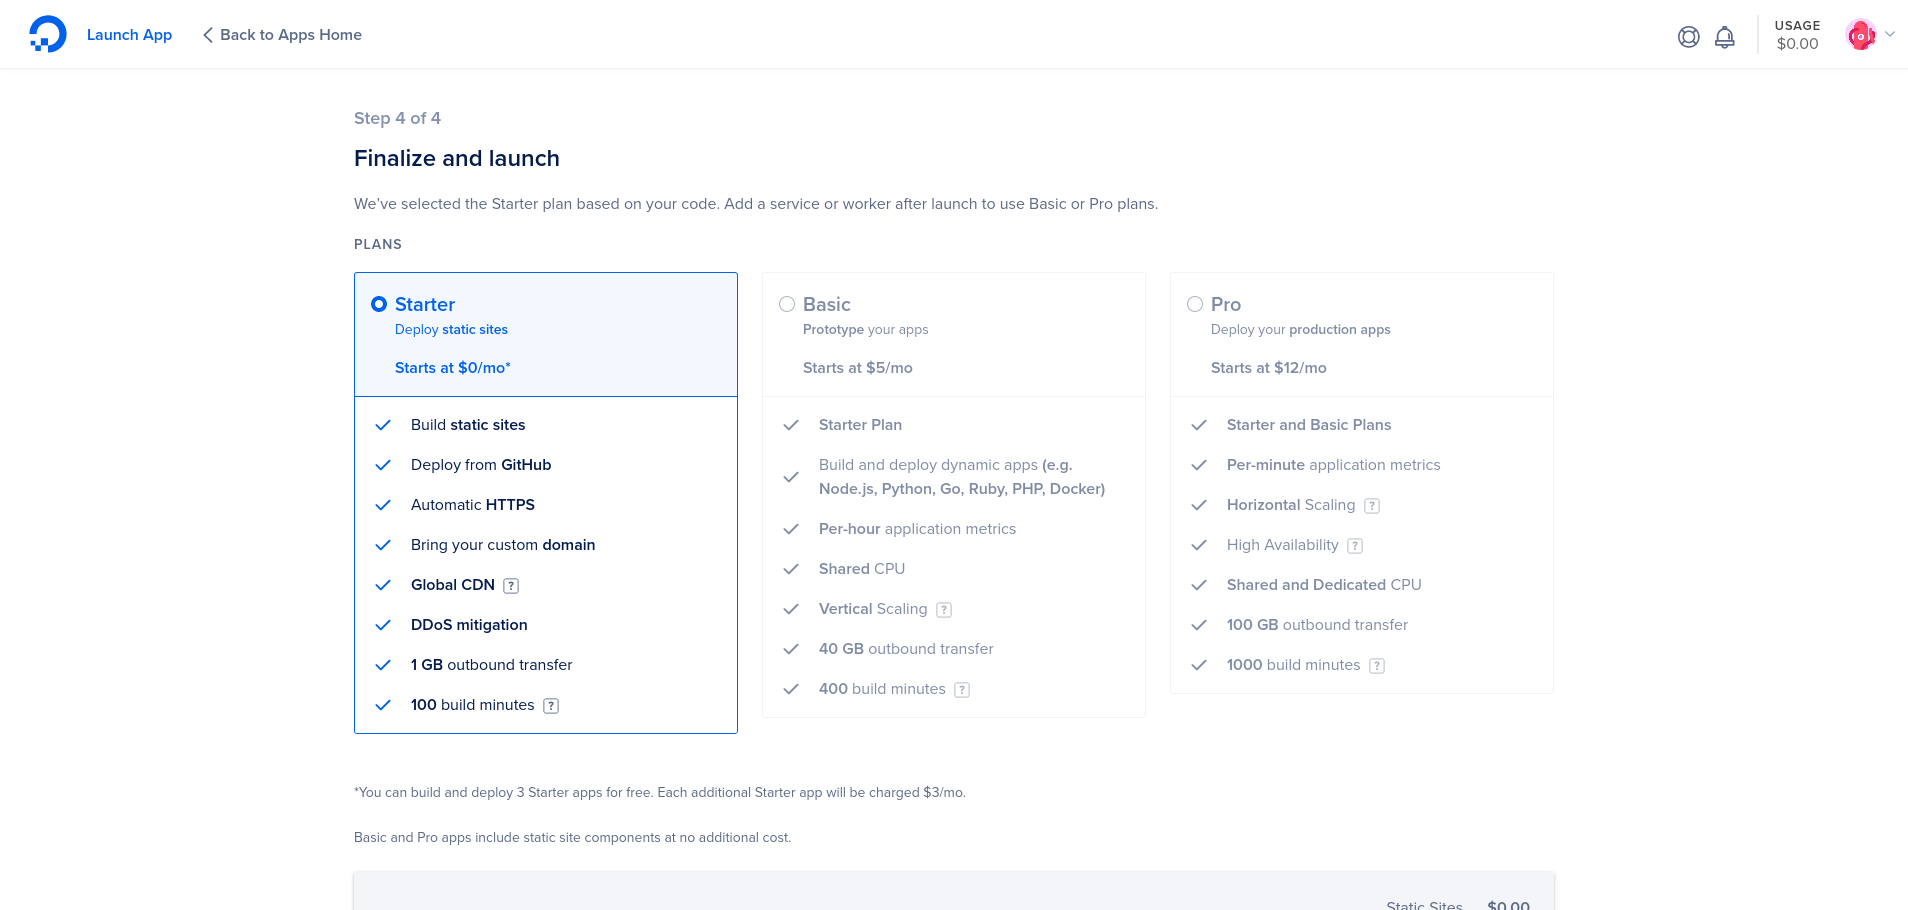
Woohoo, this is actually free! Let’s click “Next”. The app should be start deploying right away.
Visiting our blog
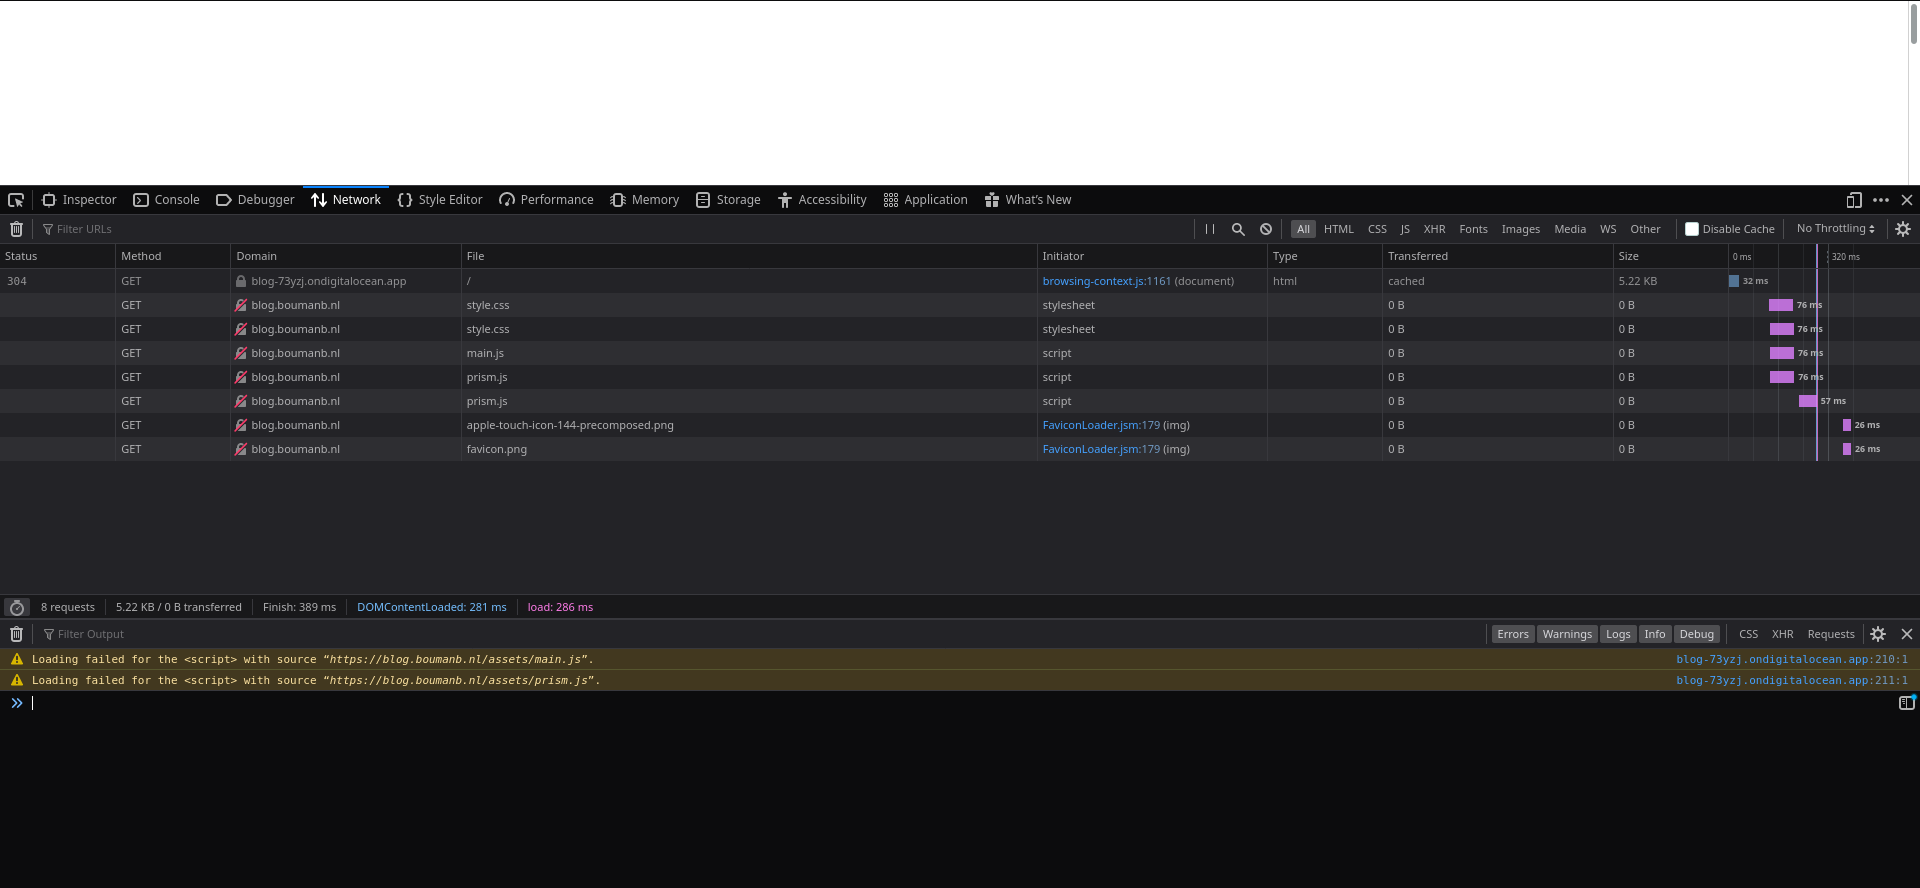
After the deployment has succeeded you can visit your blog using the URL provided by DO. Should look something like this: my-blog-73yzj.ondigitalocean.app. What!? To my surprise it presented a blank page. So I opened up the Developer Tools in Mozilla Firefox. It is trying to retrieve particular assets from the following domain: blog.boumanb.nl. And that is because in my config.toml I set the following baseurl = "https://blog.boumanb.nl". In your case it will probably state baseurl = "http://example.com".
You now have two options (one if you have no domain in your possession):
- Set
baseurlto the URL provided by DO (no domain in your possession) - Set the
baseurlto your domain name or subdomain and add that domain to the settings of your app
In both cases use HTTPS instead of HTTP, DO takes care of a valid certificate thanks to Cloudflare. The first option should be simple. Option 2 however is more complicated but Digitalocean helps you out. This post is already pretty long so I won’t dive into DNS records to deeply but in essence; you are creating an alias (using a CNAME DNS record) for the URL generated by DO. In your DO app:
- Go to “Settings”
- Search for “Domains & Certificates”
- Click “Edit”
- Press “Add domain”
- Follow the steps provided by Digitalocean
Now, DNS is slow. Also, your app is behind Cloudflare. Give the change that you have just made 5 minutes to process. Make sure to change the config.toml too and push your code to the proper branch.
Congratulations! If everything went right your blog is now published and accessible for everyone on the internet. It deploys automatically when code changes occur, it is protected by HTTPS and it’s totally free!!